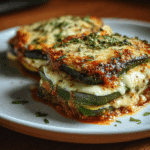
Easy Layered Zucchini Ricotta Melts Recipe
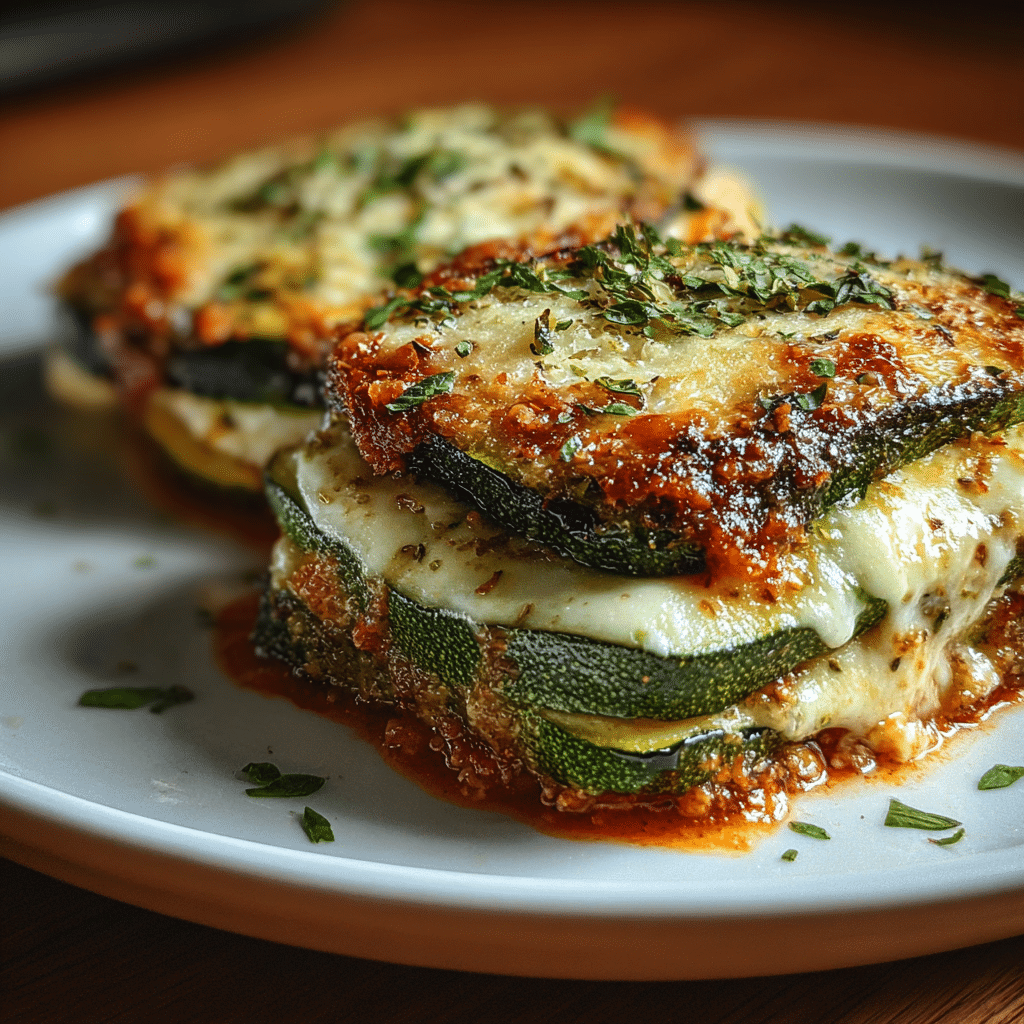
Discover a quick, delicious recipe for Layered Zucchini Ricotta Melts that combines fresh zucchini, creamy ricotta, and melty cheese in a beautifully layered dish that’s simple enough for any weeknight dinner but impressive enough for guests. This recipe brings together fresh, wholesome ingredients with a rich, cheesy finish that’s bound to become a favorite. Whether you’re looking for a light yet satisfying meal or a versatile dish to share, Layered Zucchini Ricotta Melts are both easy and incredibly flavorful.
Why You’ll Love This Recipe
- Simple yet impressive: The layered presentation looks stunning while requiring minimal cooking skills.
- Fresh and flavorful: Zucchini’s natural mildness pairs perfectly with creamy ricotta and tangy melted cheese.
- Quick prep time: Ready in under 40 minutes, making it perfect for busy days or last-minute dinners.
- Healthy comfort food: Packed with fresh vegetables and protein-rich ricotta, great for nourishing your body.
- Versatile serving options: Works beautifully as a main dish, side, or appetizer for any occasion.
Ingredients You’ll Need
The beauty of Layered Zucchini Ricotta Melts lies in the simple, fresh ingredients that each bring their own unique taste and texture to the dish. Every component from the tender zucchini to the creamy ricotta is essential for creating a perfectly balanced meal.
- Fresh zucchini: Thinly sliced for tender layers that soak up flavors without overpowering the dish.
- Ricotta cheese: Provides a creamy, mild base that adds richness and a smooth texture.
- Shredded mozzarella: Melts beautifully, creating that gooey, cheesy top layer everyone loves.
- Grated Parmesan: Adds a salty, nutty depth that enhances the overall flavor complexity.
- Fresh garlic: Minced finely to infuse the dish with a warm, aromatic undertone.
- Olive oil: Used to sauté zucchini slightly and for drizzling, enhancing flavor and moisture.
- Fresh basil or oregano: Adds a fresh herbal note that brightens every bite.
- Salt and pepper: Essential seasoning to bring out all the natural flavors.
Variations for Layered Zucchini Ricotta Melts
This recipe is wonderfully adaptable, allowing you to tailor it to your dietary preferences or the ingredients you have on hand. Feel free to experiment with different cheeses, herbs, or additional veggies for a personalized twist.
- Vegan version: Swap ricotta with plant-based cheese and use vegan mozzarella for a dairy-free option.
- Add protein: Layer in cooked ground turkey or shredded chicken for a heartier meal.
- Extra veggies: Incorporate sliced mushrooms, spinach, or roasted peppers for more variety.
- Spicy kick: Add crushed red pepper flakes or a dash of hot sauce between layers for some heat.
- Herb swaps: Experiment with thyme, rosemary, or parsley instead of basil for different herbal notes.

How to Make Layered Zucchini Ricotta Melts
Step 1: Prepare the zucchini
Start by washing your zucchini thoroughly and slicing them into thin, even rounds. This helps ensure even cooking and a delicate texture when layered. Lightly sauté the slices in olive oil with minced garlic for 3 to 4 minutes until slightly tender but still firm.
Step 2: Mix the ricotta filling
In a bowl, combine the ricotta cheese with a pinch of salt, pepper, and finely chopped fresh basil. Stir until smooth and creamy. This mixture adds a luscious layer that balances the zucchini’s mild flavor perfectly.
Step 3: Assemble the layers
In a greased baking dish, start with a thin layer of sautéed zucchini. Spread a layer of ricotta mixture over top, followed by a generous sprinkle of shredded mozzarella and Parmesan. Repeat the layers until all ingredients are used, finishing with a final cheese topping.
Step 4: Bake to perfection
Bake the assembled dish in a preheated oven at 375°F (190°C) for about 20-25 minutes. This bakes the layers through and melts the cheeses to golden perfection. Let it rest for a few minutes before serving to allow the flavors to meld.
Pro Tips for Making Layered Zucchini Ricotta Melts
- Slice evenly: Uniform zucchini slices cook evenly and create a beautiful layered effect.
- Don’t skip sautéing: Lightly cooking zucchini prevents sogginess in the final bake.
- Drain ricotta: If your ricotta is very watery, drain excess liquid for better texture and less moisture.
- Use fresh herbs: Fresh herbs make a big difference in flavor over dried alternatives.
- Let it cool slightly: Resting after baking helps the layers set and slice neatly without collapsing.
How to Serve Layered Zucchini Ricotta Melts
Garnishes
Top your melts with fresh basil leaves or a sprinkle of finely grated Parmesan for an inviting and fresh presentation. A light drizzle of high-quality olive oil just before serving adds a beautiful sheen and extra flavor.
Side Dishes
Pair the melts with a crisp green salad for freshness or some warm crusty bread to soak up every cheesy bite. Garlic bread or a simple tomato and cucumber salad also complement the dish’s flavors wonderfully.
Creative Ways to Present
Serve individual portions in small ramekins for an elegant appetizer or layer them in a large casserole dish for family-style dining. For a fun twist, try assembling the melts in small glass jars or clear bakeware to showcase the layers visually.
Make Ahead and Storage
Storing Leftovers
Place leftovers in an airtight container and store in the refrigerator for up to 3 days. This allows the flavors to continue melding and makes for an easy next-day meal.
Freezing
Freeze any extra Layered Zucchini Ricotta Melts in a freezer-safe container for up to 2 months. Thaw overnight in the refrigerator before reheating for best texture and flavor retention.
Reheating
Reheat in the oven at 350°F (175°C) for 10-15 minutes until warmed through and the cheese is bubbly again. Avoid the microwave if possible to maintain the dish’s layered texture and prevent sogginess.
FAQs
Can I use other types of cheese?
Absolutely! Feel free to substitute mozzarella and Parmesan with cheeses like fontina, provolone, or even goat cheese for a different flavor profile.
Is this recipe gluten-free?
Yes! Layered Zucchini Ricotta Melts are naturally gluten-free, making them a perfect option for gluten-sensitive or celiac diners.
How can I make this dish vegan?
Replace ricotta with vegan ricotta alternatives or blended tofu, and use vegan mozzarella cheese to make this recipe fully plant-based.
Can I prepare this dish ahead of time?
You can assemble the Layered Zucchini Ricotta Melts a few hours before baking and refrigerate until ready, just increase baking time slightly if baking straight from cold.
What’s the best zucchini to use?
Choose medium-sized zucchini that are firm and fresh. Smaller zucchini tend to be sweeter and less watery, which is ideal for this recipe.
Final Thoughts
Ready to enjoy a dish that’s both comforting and fresh? Layered Zucchini Ricotta Melts combine wholesome ingredients into a delicious, cheesy meal that’s surprisingly simple to make. Whether you’re cooking for yourself or hosting friends, this recipe promises to deliver warmth and flavor every time—give it a try and watch it become a new favorite in your home kitchen!
Related Posts
- Irresistible Honey Pepper Chicken Mac with Bacon Recipe
- Easy Pasta Primavera with Fresh Veggies Recipe
- Easy Chicken Gyros with Tzatziki Sauce Recipe
Layered Zucchini Ricotta Melts
Layered Zucchini Ricotta Melts are a quick and delicious dish featuring fresh zucchini, creamy ricotta, and melty cheeses layered to create a satisfying, wholesome meal. Perfect for weeknight dinners or impressing guests, this recipe offers a healthy comfort food option that’s naturally gluten-free and packed with flavor and texture.
- Prep Time: 15 minutes
- Cook Time: 25 minutes
- Total Time: 40 minutes
- Yield: 4 servings 1x
- Category: Appetizers
- Method: Baking
- Cuisine: Italian-inspired
- Diet: Gluten Free
Ingredients
Main Ingredients
- 2 medium-sized fresh zucchini, thinly sliced
- 1 cup ricotta cheese
- 1 cup shredded mozzarella cheese
- 1/4 cup grated Parmesan cheese
- 2 cloves fresh garlic, minced
- 2 tbsp olive oil, divided (for sautéing and drizzling)
- 2 tbsp fresh basil or oregano, finely chopped
- Salt, to taste
- Black pepper, to taste
Instructions
- Prepare the zucchini: Wash the zucchini thoroughly and slice into thin, even rounds. Lightly sauté the slices in 1 tablespoon olive oil with the minced garlic for 3 to 4 minutes until they are slightly tender but still firm to the touch.
- Mix the ricotta filling: In a medium bowl, combine the ricotta cheese with a pinch of salt, black pepper, and the chopped fresh basil or oregano. Stir well until smooth and creamy, creating a flavorful ricotta layer.
- Assemble the layers: Grease a baking dish lightly with olive oil. Start with a thin layer of the sautéed zucchini slices. Spread a layer of the ricotta mixture over the zucchini, followed by a generous sprinkle of shredded mozzarella and grated Parmesan. Repeat these layers until all ingredients are used, finishing with a final topping of mozzarella and Parmesan cheese.
- Bake to perfection: Preheat your oven to 375°F (190°C). Bake the layered dish for 20 to 25 minutes until the cheese melts and turns golden brown. Remove from oven and let rest for a few minutes to allow the layers to set and flavors to meld before serving.
Notes
- Slice zucchini evenly for consistent cooking and presentation.
- Do not skip sautéing zucchini to prevent sogginess in the final dish.
- If ricotta is watery, drain excess liquid to improve texture.
- Use fresh herbs for the best flavor; dried can be a substitute if necessary.
- Allow the baked dish to rest before serving for neater slices.
Nutrition
- Serving Size: 1 serving
- Calories: 250 kcal
- Sugar: 3 g
- Sodium: 350 mg
- Fat: 15 g
- Saturated Fat: 6 g
- Unsaturated Fat: 7 g
- Trans Fat: 0 g
- Carbohydrates: 12 g
- Fiber: 3 g
- Protein: 12 g
- Cholesterol: 40 mg
Keywords: zucchini, ricotta, layered dish, cheesy bake, gluten-free appetizer, easy weeknight dinner, vegetarian