Easy Baked Chocolate Oatmeal Bars to Try Today
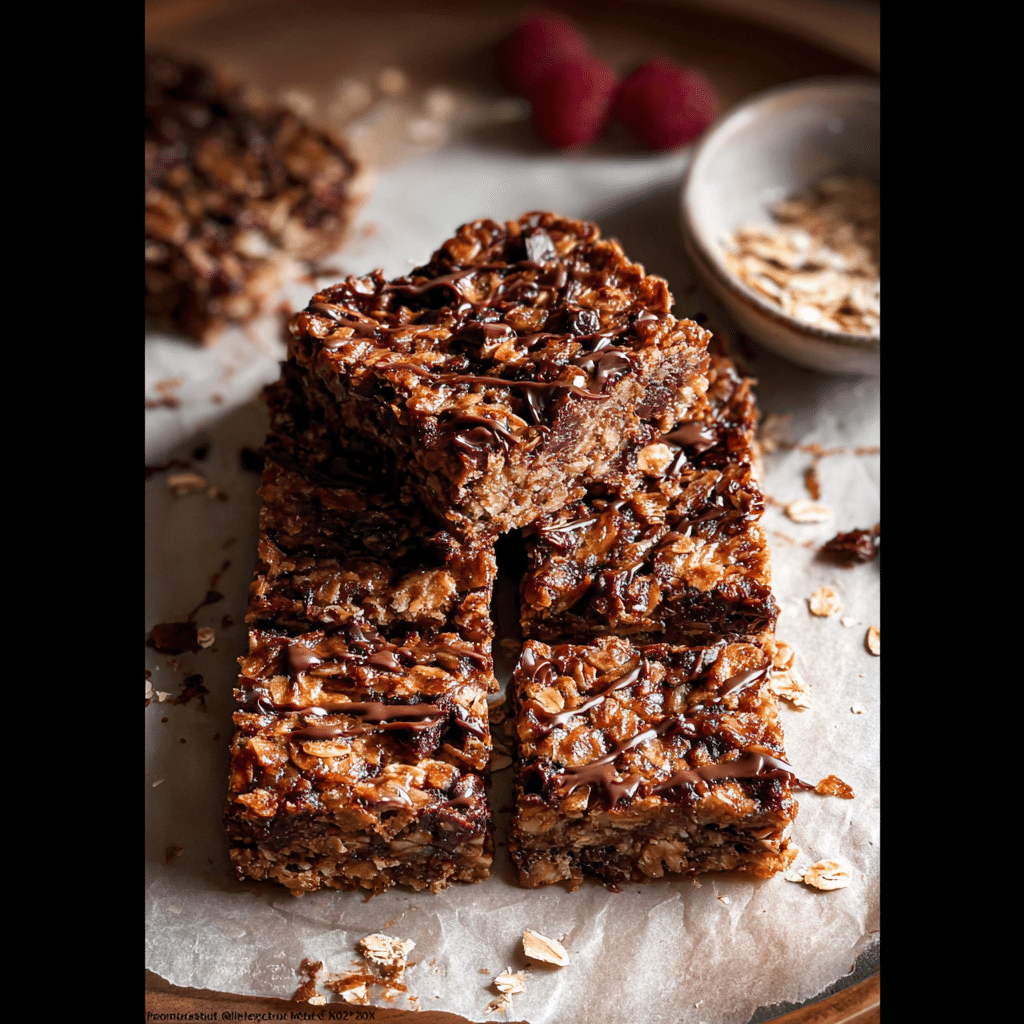
If you’re on the hunt for a snack that’s both comforting and energizing, these Baked Chocolate Oatmeal Bars are an absolute must-try. This recipe flawlessly combines the wholesome goodness of oats with the rich indulgence of chocolate, creating a treat that works perfectly for breakfast, an afternoon pick-me-up, or even a healthier dessert. Easy to prepare and packed with flavor, these bars will quickly become your go-to for satisfying those sweet cravings without reaching for processed sweets.
Why You’ll Love This Recipe
- Simple ingredients: Uses pantry staples that you likely already have on hand, making it super convenient.
- Quick to prepare: Comes together in under 10 minutes before baking, perfect for busy mornings or last-minute snacks.
- Family-friendly: Loved by kids and adults alike because of its melt-in-your-mouth texture and chocolatey bliss.
- Nutritious boost: Packed with fiber and whole grains from oats, offering sustained energy without the crash.
- Versatile for any time: Suitable for breakfast, snack, or even a guilt-free dessert option.
Ingredients You’ll Need
The beauty of this recipe lies in its straightforward but powerful ingredients. Each component contributes uniquely to the flavor, texture, and overall appeal of these Baked Chocolate Oatmeal Bars.
- Old-fashioned oats: The heart of the recipe, providing that chewy texture and hearty base.
- Unsweetened cocoa powder: Adds a rich chocolate flavor without excess sugar or fat.
- Honey or maple syrup: Natural sweeteners that bind the bars together and add moisture.
- Milk or plant-based milk: Keeps the mixture moist and softens the oat base for that perfect bite.
- Melting chocolate chips: Creates delicious pockets of melty chocolate throughout the bars.
- Baking powder: Gives the bars a light, soft texture without being cakey.
- Vanilla extract: Enhances all those chocolate and oat flavors with a warm, inviting aroma.
- Salt: Balances sweetness and enhances richness.
Variations for Baked Chocolate Oatmeal Bars
One of the best things about Baked Chocolate Oatmeal Bars is how easy it is to customize. Whether you want to switch things up for dietary reasons or just try new flavor combos, this recipe is flexible and forgiving.
- Nutty delight: Add chopped walnuts or almonds for extra crunch and healthy fats.
- Berry boost: Stir in dried cranberries, cherries, or fresh blueberries for fruity bursts in every bite.
- Peanut butter twist: Swirl in natural peanut butter for a creamy, nutty layer of flavor.
- Vegan adjustment: Use plant-based milk and maple syrup to keep the recipe fully vegan and delicious.
- Spiced warmth: Sprinkle cinnamon or a pinch of chili powder for a subtle spicy kick that pairs beautifully with chocolate.

How to Make Baked Chocolate Oatmeal Bars
Step 1: Preheat and Prepare Your Pan
Start by preheating your oven to 350°F (175°C). Line an 8×8-inch baking pan with parchment paper or lightly grease it to prevent sticking. This prep ensures the bars will come out cleanly and hold their shape.
Step 2: Mix Dry Ingredients
In a large mixing bowl, combine the oats, cocoa powder, baking powder, and salt. Give it a thorough stir so everything is evenly distributed. This step builds the dry foundation for your bars’ texture and taste.
Step 3: Add Wet Ingredients
Pour in the milk, honey or maple syrup, vanilla extract, and stir until completely mixed. The batter will look thick but sticky — this moisture will keep your bars soft and chewy.
Step 4: Fold in Chocolate Chips
Gently fold the chocolate chips into your batter, saving a handful to sprinkle on top before baking for an extra special finish.
Step 5: Bake to Perfection
Spread the mixture evenly in your prepared baking pan and top with any reserved chocolate chips. Bake for about 25-30 minutes, or until the edges are firm and a toothpick inserted in the center comes out mostly clean with just a few moist crumbs.
Step 6: Cool and Slice
Allow your Baked Chocolate Oatmeal Bars to cool completely in the pan on a wire rack before slicing into squares. Cooling is essential to help them set and avoid crumbling.
Pro Tips for Making Baked Chocolate Oatmeal Bars
- Choose quality cocoa powder: A good cocoa powder makes all the difference for rich chocolate flavor.
- Don’t overmix: Stir ingredients until just combined to avoid dense bars.
- Use parchment paper: Makes removing bars from the pan easier and keeps edges neat.
- Test doneness carefully: Bars should be slightly soft in the middle but not wet.
- Customize sweetness: Adjust honey or syrup to your preferred level of sweetness without compromising texture.
How to Serve Baked Chocolate Oatmeal Bars
Garnishes
Enhance your bars with a light dusting of powdered sugar, a drizzle of melted dark chocolate, or a sprinkle of sea salt to create a gourmet touch effortlessly.
Side Dishes
Pair the bars with a fresh fruit salad or a dollop of Greek yogurt for a balanced breakfast experience that’s both indulgent and nourishing.
Creative Ways to Present
Wrap individual bars in parchment and tie with twine for gifting or pack them in lunchboxes as a wholesome treat. They also make a fun addition to brunch spreads alongside coffee or tea.
Make Ahead and Storage
Storing Leftovers
Store your baked bars in an airtight container at room temperature for up to 3 days, or refrigerate to extend freshness for up to a week.
Freezing
If you want to prep in advance, freeze bars individually wrapped in plastic wrap inside a freezer-safe bag. They freeze well for up to 2 months without losing texture or flavor.
Reheating
Warm leftover bars for 10-15 seconds in the microwave or allow to come to room temperature naturally for a soft, freshly-baked feel.
FAQs
Can I use quick oats instead of old-fashioned oats?
While quick oats could work, old-fashioned oats provide a better chewy texture that holds up nicely during baking.
Are these bars gluten-free?
They can be if you use certified gluten-free oats and ensure all other ingredients are gluten-free friendly.
Can I substitute chocolate chips with cacao nibs?
Yes, cacao nibs add a crunchy texture and less sweetness, giving your bars a rich, slightly bitter chocolate flavor.
Is it possible to make these bars vegan?
Absolutely! Use plant-based milk like almond or oat milk and replace honey with maple syrup for a vegan version.
How long do Baked Chocolate Oatmeal Bars last?
Stored properly in an airtight container, these bars stay fresh for up to a week in the fridge or can be frozen for longer storage.
Final Thoughts
These Baked Chocolate Oatmeal Bars are truly a crowd-pleaser that balances wholesome oats with decadent chocolate in a way that’s easy to prepare and hard to resist. Whether you’re fueling a busy morning or looking for a comforting treat, they’re a reliable and delicious option. So why wait? Grab your ingredients and dive into making these bars today — your taste buds will thank you!
Related Posts
- How to Make Easy Garbage Bread Recipe Fast
- Why Try Overnight Crème Brûlée French Toast Recipe?
- Irresistible Bay Lobster Eggs Benedict with Cajun Hollandaise
Baked Chocolate Oatmeal Bars
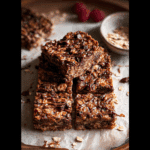
These Baked Chocolate Oatmeal Bars combine wholesome oats with rich chocolate for a comforting, energizing snack that’s perfect for breakfast, an afternoon treat, or a healthier dessert. Easy to prepare in under 10 minutes plus baking time, they feature simple pantry ingredients and deliver a soft, chewy texture with delightful pockets of melty chocolate throughout.
- Prep Time: 10 minutes
- Cook Time: 25-30 minutes
- Total Time: 35-40 minutes
- Yield: 9 bars (3x3 grid from 8x8 pan) 1x
- Category: Snack
- Method: Baking
- Cuisine: American
- Diet: Gluten Free
Ingredients
Dry Ingredients
- 1 1/2 cups old-fashioned oats
- 1/4 cup unsweetened cocoa powder
- 1 teaspoon baking powder
- 1/4 teaspoon salt
Wet Ingredients
- 3/4 cup milk or plant-based milk
- 1/3 cup honey or maple syrup
- 1 teaspoon vanilla extract
Chocolate
- 1/2 cup melting chocolate chips (plus extra for topping)
Instructions
- Preheat and Prepare Your Pan: Preheat your oven to 350°F (175°C). Line an 8×8-inch baking pan with parchment paper or lightly grease it to prevent sticking, ensuring the bars hold their shape and come out cleanly.
- Mix Dry Ingredients: In a large mixing bowl, combine the old-fashioned oats, unsweetened cocoa powder, baking powder, and salt. Stir thoroughly so everything is evenly distributed, forming the dry foundation for texture and taste.
- Add Wet Ingredients: Pour in the milk (or plant-based milk), honey or maple syrup, and vanilla extract. Stir until completely mixed; the batter will be thick and sticky, which keeps the bars soft and chewy.
- Fold in Chocolate Chips: Gently fold the chocolate chips into the batter, reserving a handful to sprinkle on top before baking for an extra chocolatey finish.
- Bake to Perfection: Spread the mixture evenly in the prepared pan and top with the reserved chocolate chips. Bake for 25-30 minutes until the edges are firm and a toothpick inserted in the center comes out mostly clean with a few moist crumbs.
- Cool and Slice: Allow the bars to cool completely in the pan on a wire rack before slicing into squares. Cooling helps the bars to set and prevents crumbling.
Notes
- Choose quality unsweetened cocoa powder for the best chocolate flavor.
- Do not overmix ingredients; stir until just combined to avoid dense bars.
- Using parchment paper makes removing the bars easier and keeps edges neat.
- Check doneness carefully: bars should be slightly soft in the middle but not wet.
- Adjust honey or maple syrup to customize sweetness without compromising texture.
Nutrition
- Serving Size: 1 bar
- Calories: 180
- Sugar: 12g
- Sodium: 85mg
- Fat: 7g
- Saturated Fat: 4g
- Unsaturated Fat: 3g
- Trans Fat: 0g
- Carbohydrates: 27g
- Fiber: 4g
- Protein: 4g
- Cholesterol: 5mg
Keywords: baked chocolate oatmeal bars, healthy snack, chocolate oat bars, gluten free bars, easy breakfast bars, homemade snack bars