How to Make Oreo Delight A Dreamy No-Bake Dessert
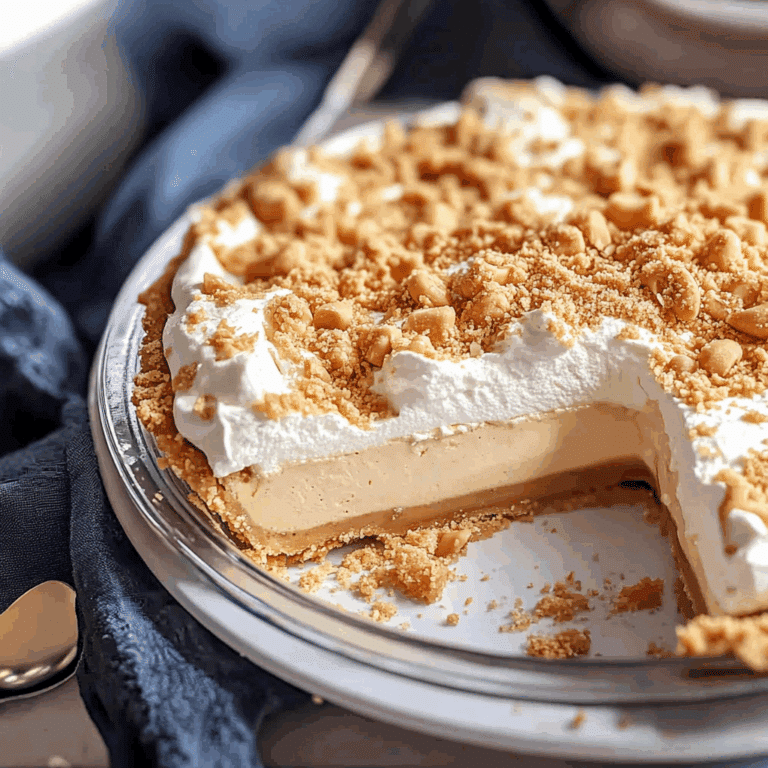
If you’re craving a dessert that combines creamy richness with a delightful crunch, you’re going to adore this easy recipe for Oreo Delight A Dreamy No-Bake Dessert. This luscious treat layers crushed Oreo cookies with a smooth, velvety filling that melts in your mouth, making it perfect for any occasion from casual family dinners to festive celebrations. The no-bake aspect means you’ll spend less time in the kitchen and more time indulging in this heavenly creation.
Why You’ll Love This Recipe
- Effortless preparation: With no baking required, this recipe is a breeze even for beginner cooks.
- Rich, creamy texture: The filling is perfectly smooth, complementing the crunchy Oreo crust beautifully.
- Versatile treat: Whether as a quick snack or party dessert, it fits every sweet need.
- Family-friendly flavors: Oreos are a beloved classic, pleasing both kids and adults alike.
- Make ahead convenience: Prepare it in advance to save time and enjoy stress-free entertaining.
Ingredients You’ll Need
This recipe shines because of its simple but essential ingredients, each carefully chosen to bring the ideal balance of flavor, texture, and color. Getting these basics right guarantees a flawless Oreo Delight A Dreamy No-Bake Dessert every time.
- Oreo cookies: Use classic Oreos for that trademark chocolate and cream bite; about 24 cookies work perfectly.
- Cream cheese: Adds richness and tang, providing structure to the creamy filling.
- Whipped topping: For lightness and fluff, making the dessert airy and soft.
- Sweetened condensed milk: Sweetens the filling naturally while helping it set without baking.
- Vanilla extract: Enhances the overall flavor with a warm, aromatic note.
- Butter: Binds the crushed Oreos together to form a solid, crunchy base.
Variations for Oreo Delight A Dreamy No-Bake Dessert
One of the best parts about this Oreo Delight A Dreamy No-Bake Dessert is how easy it is to customize. Feel free to tweak the ingredients to fit your dietary needs or personal taste. Here are some ideas to spark your creativity:
- Chocolate drizzle: Add melted semi-sweet or dark chocolate on top for extra indulgence.
- Peanut butter twist: Swirl peanut butter into the cream cheese layer for a nutty dimension.
- Fruit topping: Fresh strawberries or raspberries add freshness and a pop of color.
- Gluten-free swaps: Use gluten-free sandwich cookies to accommodate gluten sensitivities.
- Mint Oreo version: Substitute classic Oreos with mint-flavored ones for a refreshing variation.

How to Make Oreo Delight A Dreamy No-Bake Dessert
Step 1: Prepare the Oreo Crust
Start by crushing the Oreos into fine crumbs using a food processor or by placing them in a sealed bag and smashing with a rolling pin. Melt the butter and mix it into the Oreo crumbs until everything is evenly coated. Press this mixture firmly into the bottom of a square or rectangular dish to create a solid, crunchy base.
Step 2: Make the Creamy Filling
In a mixing bowl, combine softened cream cheese, sweetened condensed milk, and vanilla extract. Beat together until smooth and creamy. Gently fold in the whipped topping to maintain a light, airy texture without deflating it.
Step 3: Layer the Dessert
Spread half of the creamy filling over the Oreo crust. Sprinkle a handful of crushed Oreo pieces on top for added texture. Then layer the rest of the filling evenly over everything, smoothing the surface with a spatula.
Step 4: Chill and Set
Cover the dessert with plastic wrap and refrigerate for at least 4 hours or overnight. This allows the flavors to meld and the filling to firm up, ensuring each bite holds together perfectly.
Pro Tips for Making Oreo Delight A Dreamy No-Bake Dessert
- Use room temperature cream cheese: This ensures it blends smoothly without lumps in the filling.
- Crust pressing technique: Press the Oreo crust down firmly and evenly to create a stable base.
- Whipped topping folding: Gently fold to keep air in the mixture for a fluffy texture.
- Chill fully: Don’t rush the chilling process; the dessert needs time to set properly.
- Serve chilled: Cut the dessert while cold to maintain clean slices and beautiful presentation.
How to Serve Oreo Delight A Dreamy No-Bake Dessert
Garnishes
Top your dessert with mini Oreo crumbs, chocolate shavings, or a dollop of whipped cream for added flair. Fresh berries or a drizzle of chocolate syrup can also elevate the visual appeal and taste.
Side Dishes
This dessert pairs wonderfully with a scoop of vanilla ice cream or a hot cup of coffee or tea, balancing its richness with warmth or creaminess from the sides.
Creative Ways to Present
Serve in individual clear parfait glasses layered with crushed Oreos and filling for a stylish look. Alternatively, use ramekins or even edible chocolate bowls to add a surprise element that guests will love.
Make Ahead and Storage
Storing Leftovers
Keep your leftover Oreo Delight A Dreamy No-Bake Dessert covered in the refrigerator for up to 3 days. Make sure it’s sealed well to maintain freshness and prevent any odors from affecting the taste.
Freezing
For longer storage, freeze the dessert in an airtight container for up to one month. Thaw overnight in the fridge before serving to restore its creamy texture.
Reheating
This dessert is best enjoyed cold, so reheating is generally not recommended. Instead, allow frozen portions to thaw properly in the refrigerator for the best taste and texture.
FAQs
Can I use different cookies instead of Oreos?
Absolutely! While Oreo cookies provide that classic chocolate and cream flavor, you can experiment with other chocolate sandwich cookies or even gluten-free options depending on your preference.
Is this dessert suitable for kids?
Yes, Oreo Delight A Dreamy No-Bake Dessert is a favorite among children and adults alike due to its sweet, creamy texture and familiar flavor profile.
How long does it take to prepare this dessert?
Active preparation takes about 15-20 minutes, but chilling requires at least 4 hours so plan accordingly.
Can I make this dessert vegan or dairy-free?
With substitutions like dairy-free cream cheese, whipped coconut topping, and suitable cookies, a dairy-free or vegan version is possible, though textures might vary slightly.
Do I have to use sweetened condensed milk?
Sweetened condensed milk is key for sweetness and firmness without baking, but you could experiment with alternatives like condensed coconut milk for different flavors.
Final Thoughts
If you want a dessert that’s guaranteed to impress without complicated baking, you simply must try the Oreo Delight A Dreamy No-Bake Dessert. Its creamy layers, crunchy cookie base, and easy-to-follow recipe make it a true crowd-pleaser! Dive in and enjoy every luscious bite—you’ll be making this dreamy dessert over and over again.
PrintOreo Delight A Dreamy No-Bake Dessert
Oreo Delight A Dreamy No-Bake Dessert is a creamy, crunchy, and easy-to-make treat that layers crushed Oreo cookies with a smooth, velvety cream cheese filling. Perfect for any occasion, this no-bake dessert requires minimal effort and offers a rich, airy texture that kids and adults will love.
- Prep Time: 15 minutes
- Cook Time: 0 minutes
- Total Time: 4 hours 15 minutes (including chilling time)
- Yield: 8 servings 1x
- Category: Dessert
- Method: No-Bake
- Cuisine: American
- Diet: Can be made Gluten Free with substitutions
Ingredients
For the Oreo Crust
- 24 classic Oreo cookies
- 6 tablespoons butter, melted
For the Creamy Filling
- 8 ounces cream cheese, softened
- 1 cup whipped topping
- 14 ounces sweetened condensed milk (1 can)
- 1 teaspoon vanilla extract
Instructions
- Prepare the Oreo Crust: Crush the Oreo cookies into fine crumbs using a food processor or place them in a sealed bag and smash with a rolling pin. Melt the butter and mix it into the Oreo crumbs until evenly coated. Press this mixture firmly into the bottom of a square or rectangular dish to form a solid, crunchy base.
- Make the Creamy Filling: In a mixing bowl, combine softened cream cheese, sweetened condensed milk, and vanilla extract. Beat together until smooth and creamy. Gently fold in the whipped topping to keep the mixture light and airy.
- Layer the Dessert: Spread half of the creamy filling evenly over the Oreo crust. Sprinkle a handful of crushed Oreo pieces on top for added texture. Then layer the remaining filling over everything and smooth the surface with a spatula.
- Chill and Set: Cover the dessert with plastic wrap and refrigerate for at least 4 hours or overnight. This will allow the flavors to meld and the filling to firm up for perfect consistency.
Notes
- Use room temperature cream cheese for a smooth, lump-free filling.
- Press the Oreo crust down firmly and evenly to create a stable base.
- Gently fold in whipped topping to maintain a fluffy texture.
- Chill the dessert fully; do not rush the setting time.
- Serve chilled for clean slices and the best presentation.
Nutrition
- Serving Size: 1 slice (1/8th of dessert)
- Calories: 350
- Sugar: 28g
- Sodium: 150mg
- Fat: 22g
- Saturated Fat: 12g
- Unsaturated Fat: 8g
- Trans Fat: 0g
- Carbohydrates: 32g
- Fiber: 1g
- Protein: 4g
- Cholesterol: 60mg
Keywords: Oreo, no-bake dessert, creamy dessert, Oreo crust, easy dessert, family-friendly dessert